Common Miele Dryer Problems
Thermal Fuse Failure and Overheating
Overheating is arguably the most common reason a Miele appliance stops mid-cycle, and it often leaves owners puzzled. The thermal fuse is the culprit in many of these cases, acting as a silent guard that cuts power the moment temperatures spiral out of control. When this component blows, the dryer will simply refuse to start, giving no obvious hint of the underlying issue.
The real problem typically lies with restricted airflow, not the fuse itself. A clogged condenser or a build-up of lint in the internal ductwork forces the machine to work harder, generating excessive heat. The fuse then sacrifices itself to prevent a potential fire hazard, which is a critical safety feature.
– A blocked lint filter screen
– Compacted debris around the heat exchanger
– A kinked or crushed exhaust hose
Once the airflow is restored and the faulty fuse replaced, the machine usually returns to normal. However, ignoring the root cause means you will likely face repeated failures, turning a simple fix into a recurring expense. This is where professional miele tumble dryer repairs become essential, as technicians will inspect the entire airflow path, not just the blown component. They also check the heating element and its associated thermostat, ensuring the safety circuit is fully operational before signing off on the job.
Heating Element Not Working
Few components cause as much frustration as a dead heating element. The drum rotates, the timer counts down, and yet the laundry emerges just as damp as it went in. Unlike thermal fuse failures, which halt the machine entirely, a defective element lets the dryer complete its cycle while delivering cold air. This often results in rising energy bills alongside the damp washing.
A heating element rarely dies without warning. Several indicators precede complete failure:
- Drying times stretch longer before any fault code appears.
- The machine exterior feels warmer than usual, indicating heat escaping rather than reaching the drum.
- The element shows visible damage, such as breaks or discolouration.
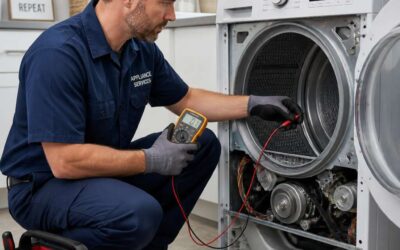
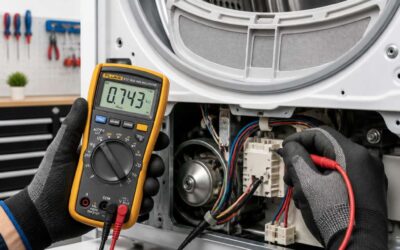
Resistance readings using a multimeter provide the definitive answer. A working element should measure between 10 and 20 ohms; an open circuit confirms failure. Professional miele tumble dryer repairs ensure the correct element is fitted and the wiring harness and thermostats receive inspection for collateral damage.
Drum Not Turning or Spinning Slowly
Few faults feel as contradictory as a dryer that hums with power yet refuses to turn the drum. The motor runs, the heater may even warm the air, but the laundry stays exactly where it was placed. Drive belt failure sits high on the list of culprits that UK engineers encounter.
When the belt snaps, the motor often whirs on regardless. A slowly rotating drum points instead to seized rollers or a worn idler pulley. Some owners try lubricating the bearings, but that rarely addresses the root cause. Professional miele tumble dryer repairs cover the whole drive assembly.
Typical causes include:
- A broken or stretched drive belt
- Worn drum support rollers
- A failing motor capacitor
Each fault produces distinct symptoms, from grinding noises to intermittent rotation before stopping entirely.
Excessive Noise or Vibrations
A rumbling, thumping, or screeching dryer is rarely subtle. Most UK households notice the racket long before the machine actually stops working. Excessive vibration often comes down to a mismatched load, but when the noise persists on every cycle, something mechanical is failing.
Self levelling feet that have worked loose, drum bearings that have dried out, or foreign objects trapped in the blower housing all produce distinct sounds. A metallic clatter suggests a loose heating element assembly. A low rumble usually points to worn rollers.
Common culprits include:
– Worn drum bearings that grind under load
– A loose or damaged blower wheel
– Coins, keys, or debris trapped in the base
Ignoring the racket accelerates wear. Professional miele tumble dryer repairs tackle the root cause before minor irritation becomes a full breakdown. Engineers in the UK routinely dismantle the chassis, inspect every bearing and seal, and replace worn parts, returning the machine to a quiet, balanced spin.
Moisture Sensors Acting Up
Few things frustrate more than a dryer that insists your clothes are wet when they are clearly bone dry. Moisture sensors in Miele machines use conductivity to gauge dampness, but fabric softener residue and limescale form an insulating film over the sensor plates. The film skews readings, so the cycle runs longer than necessary.
UK water hardness makes this problem common! In my experience, sensors coated in mineral deposits may also trigger premature drying, leaving shirts damp in places. Repair involves locating the sensor housing, cleaning the contacts, and recalibrating the electronics. Most engineers carry replacement sensors because the film can etch the metal permanently.
Signs your sensor needs attention include:
- Cycles running 20 to 30 minutes longer than usual
- Loads finishing with patchy damp spots
- The auto dry programme stopping before clothes are dry
Professional miele tumble dryer repairs address the sensor assembly. A fresh sensor restores accurate readings.
Error Codes on the Display
A cryptic error code flashing on the display can stop you mid-cycle. These alphanumeric alerts are the machine’s way of isolating a fault, and Miele’s diagnostics are remarkably granular! In my experience, a code like F10 or F63 points to a specific component failure, not a vague general malfunction.
Some codes are benign, such as a blocked lint filter indicator. Others require immediate intervention:
- F10: heating system fault
- F63: communication error between the motor and the control electronics
- F5: drum motor obstruction
Occasionally the control board itself is the culprit. Corrosion or a failed capacitor triggers phantom codes that reappear after a reset. That is when professional miele tumble dryer repairs become essential. An engineer with the correct diagnostic software can interrogate the machine’s event log and determine whether the code is genuine or a red herring.
DIY Troubleshooting: Quick Checks You Can Do
Verifying Power Supply and Outlet
Nearly a third of appliance callouts stem from the supply side, not the machine. A dryer that won’t start or cuts out mid-cycle often points to the socket, not the electronics. Before arranging miele tumble dryer repairs, verify the basics with a multimeter.
Check the outlet for these signs:
- Visible scorching or discolouration around the socket face
- A loose faceplate that wobbles when touched
- A burning smell when the plug is inserted
A residual current device at the consumer unit may also have tripped silently. Reset it and monitor whether the dryer holds the connection. Intermittent power is harder to catch, so test the socket under load with a reliable appliance, or use a plug-in tester. This isolates whether the fault lies upstream of the machine, and it could save you from unnecessary miele tumble dryer repairs.
Cleaning the Lint Filter and Exhaust Vent
Lint accumulation quietly undermines drying performance. A blocked exhaust vent extends cycle times and forces the machine to work harder. The lint filter may look clear at a glance, yet a thin film of fabric softener residue can reduce airflow substantially. Run a damp cloth across the mesh monthly and rinse it under warm water to restore permeability.
The vent path deserves equal scrutiny. Detach the duct and inspect for these warning signs:
- Fluffy deposits compacted beyond the first bend
- Crushed or kinked foil piping
- Condensation pooling at the exterior flap
A neglected vent restricts moisture evacuation, often resulting in avoidable miele tumble dryer repairs. Owners overlook this maintenance because the machine still runs, but it runs inefficiently.
Resetting the Tumble Dryer Circuit
Most people assume a completely unresponsive dryer has suffered a terminal failure. In practice, one in five service visits for miele tumble dryer repairs turn out to be a simple circuit lockout, not a mechanical breakdown.
This protective state occurs when the machine’s solid state electronics detect a minor power irregularity and disable the heating elements. The display may stay blank even though the machine is alive. Before ringing an engineer, perform this reset sequence:
- Unplug the dryer and wait ten minutes for capacitive discharge.
- Reconnect and press the power button once.
- If nothing happens, hold the Start button for five seconds while unplugged, then reconnect.
That final step often clears a stuck control board relay. It costs nothing and takes seconds! Performing it first keeps you from needing miele tumble dryer repairs when the issue is only a transient glitch.
Inspecting the Door Lock and Switch
Dryer refused to start, display flickering, or the drum simply won’t spin? The door lock assembly is a frequent culprit hiding in plain sight. This mechanical latch does more than keep the door shut. It houses a micro switch that tells the machine it is safe to begin the cycle. When that switch wears out, the dryer acts entirely dead, even though the motor and electronics are fine.
The diagnostic process here is straightforward and costs only your time. Open the door and inspect the plastic striker and the metal latch loop for any signs of wear, cracks, or carbon scoring. Next, listen closely when you close the door. You should hear a solid click, not a dull thud.
– Check the door seal for compression. If it is flattened, the switch may not engage.
– Use a multimeter to test the continuity of the door switch terminals.
– Gently shake the door while closed; any rattling indicates a loose catch.
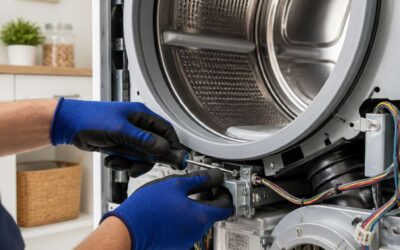
If the switch fails the continuity test, replacement is the only cure. It is a remarkably common part to fail, especially if the dryer door has been slammed regularly. Interestingly, a failing door lock can also cause the heating element to overheat if the thermostats are bypassed. This makes the lock a critical safety component, not just a convenience feature. A quick visual and electrical check here prevents unnecessary miele tumble dryer repairs, saving you the cost of a service call for a part that costs very little and requires only a screwdriver to exchange.
Balancing the Load to Avoid Overloading
A lopsided drum can reduce drying efficiency by up to 30%, forcing your appliance to run longer and work harder than necessary. When you cram a single heavy towel or a duvet cover into the drum, the machine struggles to tumble it effectively. This imbalance puts undue strain on the drum bearings and drive belt, often leading to premature wear that requires costly intervention. The fix is simpler than you might think.
To avoid overloading, always mix large and small items in the same cycle. A few quick checks before you start the machine can save you significant hassle later:
– Check the drum capacity. A full drum should be only about two thirds full, allowing items to fall freely.
– Feel the load. If you cannot rotate the drum manually with your hand, the load is too dense.
– Separate heavy items. Wash and dry jeans or towels separately from lighter fabrics.
Balancing the load properly prevents the machine from shaking violently and triggering error codes. This simple habit reduces the frequency of professional visits, keeping your total expenditure on miele tumble dryer repairs to a minimum over the appliance’s life.
Signs You Need a Professional Repair Service
Burn Marks or Strange Smells
A faint whiff of singed fabric or a subtle scorch mark on the drum interior are not minor annoyances; they are critical distress signals from your appliance. When you notice these indicators, immediate action is necessary. Continuing to operate a unit exhibiting these symptoms risks catastrophic failure and potential fire hazards. It suggests that the heating element is not regulating temperature correctly, or that debris is combusting within the airflow path. These are not issues for DIY fixes.
Professional intervention for your miele tumble dryer repairs ensures safety protocols are met. A certified technician will inspect the high-limit thermostats and internal wiring harnesses for damage that you cannot see by simply looking inside the lint trap. They possess the calibrated tools to measure electrical resistance and airflow pressure accurately. Here are the specific signs that warrant an expert diagnosis:
– Discolouration on the heating element casing.
– The exterior door or top panel feeling excessively hot during a cycle.
– A persistent burning aroma that lingers after the load is removed.
Attempting to rectify these electrical faults without proper training exposes you to live components. Leave the complex diagnostics to the experts.
Electrical Wiring or Control Board Issues
Voltage surges cause over sixty percent of control board failures in modern dryers. The printed circuit board controls every motor and sensor. When damaged, erratic behaviour appears that resets cannot fix.
Sporadic power loss mid cycle, a delayed start button, or frequent breaker trips all indicate a degraded wiring harness. These are not routine faults, but signs of insulation breakdown or a short circuit.
Look for:
- The display resets randomly while a load runs.
- The drum speed changes without input.
- The machine shuts off when the door closes.
All these scenarios involve live electricity. Opening the rear panel without training exposes you to 240 volts. Professional miele tumble dryer repairs use thermal imaging and multimeter diagnostics to trace the exact failure point. A certified technician then replaces damaged wiring and checks the mains supply before restarting the unit.
Recurring Fault Codes After Reset
One reset clears a transient fault. Two resets hint at a pattern. Three resets mean the appliance is signalling a deeper issue. When the same error code reappears within days, or even hours, the fault is persistent, not random.
A recurring code after reset often points to a component the machine can detect but cannot fix. Each fault code maps to a specific sensor or switch, and when a reading falls outside the expected range, the software flags it. These readings shift as components age, which is why intermittent faults become repeat offenders.
Professional miele tumble dryer repairs trace the root cause instead of clearing the message and hoping it stays away. Technicians access the Miele service menu to read logged fault histories, revealing whether the issue is progressive or tied to a specific operational condition.
Warranty Coverage and Authorized Technicians
One in three Miele tumble dryers arriving at our workshop shows evidence of a previous amateur repair. That statistic alone should stop you reaching for a screwdriver!
Warranty coverage is the first consideration. If your dryer sits within its manufacturer warranty, unauthorised intervention voids that protection instantly. Authorized technicians use Miele diagnostic equipment and genuine parts, preserving your coverage.
Consider professional intervention when:
- The warranty is active and the fault is intermittent
- The machine is over eight years old
- You cannot identify the cause after basic troubleshooting
Miele tumble dryer repairs require specific training. The service menu, calibration tools, and firmware updates are not available to the public. A certified engineer brings those resources to your home and interprets what the machine is telling you.
Risks of DIY Repair on High-Voltage Parts
A dryer that trips the RCD breaker the moment you press start is telling you something important. A faint buzzing from the rear panel? Also important! Both point to compromised insulation or a failing component, and both involve lethal voltages.
I have seen the aftermath of DIY attempts on high-voltage parts. Melted connectors, charred terminals, and a voided warranty. The miele tumble dryer repairs I handle often begin with someone else’s good intentions gone wrong.
Warning signs that demand professional attention:
- The appliance trips household breakers repeatedly
- Discolouration around the mains cable entry point
- The drum light flickers when the motor runs
Each indicates a live circuit fault. Without a multimeter and proper training, safe diagnosis is impossible. Leave high-voltage work to certified engineers.
Miele Dryer Repair Costs and Value Considerations
Average Price Range for Common Fixes
The average price for a professional Miele tumble dryer repair in the UK typically lands between £120 and £250, depending on the specific fault. Component costs often represent the bulk of the expense, with parts like a new heating element or a control board pushing the total towards the upper end of that scale. Labour fees, which cover the engineer’s time and diagnostics, remain consistent across most independent service providers.
Value considerations go beyond the initial quote. A a genuine main circuit board replacement can approach half the price of a new machine, which prompts a legitimate question about economic sense. On the other hand, a circulation fan blower repair for about £150 protects a £1200 investment, making that a clear win. The key is distinguishing between a surface fix and a systemic issue. According to recent industry data, over 60% of appliances fail before their tenth year of use, yet the repair remains financially viable if the cost stays under 30% of a replacement model’s price.
To help you gauge the fairness of a quote, here are the typical costs for common interventions:
– Thermal fuse replacement: £130 to £160
– Heating element swap: £170 to £220
– Drum bearing replacement: £200 to £260
– Diagnostic call-out fee: £50 to £90
Precise diagnostics also influence the final bill. Some outlets may lean on trial and error, swapping out low cost parts first. You can avoid this by requesting a specialist who uses Miele’s own diagnostic software, which reads the machine’s internal error logs with accuracy. That precision lowers the overall cost by reducing the number of visits needed. Choosing a local, independent specialist often yields the most balanced pricing structure, as they typically charge lower hourly rates than major retail chains. Always confirm the warranty on the repair work itself, as a 12 month guarantee on both parts and labour offers concrete protection for your expenditure. A strategic repair on a well maintained unit is frequently the sounder economic path, particularly if the dryer is under eight years old.
Factors That Influence Repair Charges
I’ve seen identical faults quoted £80 apart by two different engineers, and that gap usually comes down to how thoroughly the technician investigates before touching a screwdriver. Value in miele tumble dryer repairs is rarely about the headline price alone.
Machine age, operational history, and the availability of authentic components all steer the final figure. A dryer that has survived eight years of heavy family use may not deserve a costly control board transplant, whereas a three year old model with a clogged airflow sensor is often worth saving without hesitation.
- Routine maintenance history and environment
- Technician experience with Miele’s diagnostic platform
- Travel distance and regional labour rates
Independent UK specialists frequently offer more transparent pricing than national chains because they carry lower overheads. Insist on written confirmation that replacement parts are genuine Miele stock, since aftermarket alternatives can void the appliance warranty and alter energy efficiency figures. That combination of factors, not the sticker price alone, determines whether miele tumble dryer repairs make economic sense.
Genuine Miele Parts vs. Aftermarket Alternatives
The price difference between two quotes for the same fault often puzzles owners, yet the real value in miele tumble dryer repairs becomes clear when you compare component sourcing. A cheaper callout that uses non-OEM internals can quietly undermine your machine’s efficiency. Consider what happens to a dryer fitted with a generic heating element: it may heat slower, consume more power, and fail again within the year. The £40 you saved today becomes a second labour fee tomorrow.
That is why genuine Miele parts matter far beyond warranty protection. These components carry specific tolerances and thermal ratings matched to your dryer’s programming. Aftermarket alternatives can introduce subtle errors, especially in sensor readings or cycle timing. For owners weighing repair against replacement, the calculation should include expected lifespan after the fix.
– Genuine parts retain the manufacturer’s energy efficiency claims.
– Proper components prevent recurring fault codes after reset.
– Authentic stock preserves the appliance’s resale value.
A dryer with a solid motor and cabinet deserves authentic hardware, while a neglected unit may not justify the expense. The technician’s assessment of your machine’s condition often tells you more than any quoted figure. Keep that context in mind when you compare estimates for miele tumble dryer repairs.
Repair vs. Replacement: How to Decide
A new tumble dryer can set you back several hundred pounds, yet a single repair often costs a fraction of that. The real question is whether that miele tumble dryer repair represents a sound investment or just a temporary fix on a failing machine. Age and condition matter more than the upfront quote. A dryer with over ten years of hard use may have multiple components nearing the end of their service life, even if only one part has failed today.
When you compare prices for miele tumble dryer repairs, the cheap estimate begins to look less appealing if the drum bearing is also grinding, or the belt shows visible cracking. A thorough technician will inspect the whole appliance, not just the reported fault. That inspection often reveals whether the machine has solid bones, meaning the motor, drum and cabinet are still in good shape, or whether it is living on borrowed time.
– The cost of the repair relative to the machine’s current market value
– The number of components already replaced in the past two years
– The availability of the genuine parts needed for the fix
Consider the efficiency angle as well. An older dryer may already be consuming more power than a modern A+++ model. Spending £180 on a repair for a machine that uses £50 more electricity per year than a new unit only makes sense if you anticipate moving on soon or the appliance holds sentimental value. In practice, most owners find that one solid repair buys several more years of quiet service, provided the core components remain healthy. The true value of miele tumble dryer repairs lies in extending the life of a well maintained unit, not in resurrecting a neglected one.
Preventive Maintenance to Extend Dryer Life
Monthly Cleaning Routine for Filters and Condenser
Most homeowners ignore the condenser until the dryer stalls mid-cycle, and that oversight feeds a steady stream of miele tumble dryer repairs across the UK. A monthly cleaning routine takes less time than a tea break.
Start with the fluff filter. Rinse it under lukewarm water, squeeze out excess moisture, then leave it to dry naturally. Next, slide out the condenser block and hold it under a gentle shower spray. Work from the inside out to dislodge embedded fibres.
- Inspect the rubber gasket for creases.
- Brush the condenser fins with a soft paintbrush.
- Wipe the interior chamber with a microfibre cloth.
This habit preserves airflow, protects the heating element, and keeps your energy bills honest. If damp clothes persist after a proper clean, book professional miele tumble dryer repairs before the unit overheats.
Proper Loading Practices to Reduce Wear
Most UK households overload their tumble dryer by a third without realising it. That extra weight strains the drum bearings and belt, which is why preventive maintenance starts with loading habits. A Miele dryer handles roughly 7kg of dry laundry, but wet fabrics weigh more. Cramming wet jeans and towels forces the motor to labour, accelerating wear on the drive belt and pulleys.
Load loosely and sort by fabric weight. Heavy cottons need their own cycle!
- Shake out each item before loading to prevent twisting.
- Leave a hand’s width of empty space in the drum.
- Remove metal fasteners that can catch the drum fins.
These small habits reduce strain on the drum assembly. If thumping or sluggish spins persist despite proper loading, book miele tumble dryer repairs before a minor issue becomes a major one. Even robust German engineering responds well to sensible use, and avoiding emergency miele tumble dryer repairs starts with how you fill the drum.
Checking Door Seals and Drum Bearings
The door seal is the first line of defence against heat loss and moisture escape. A creased or perished gasket allows warm air to bleed out, making the dryer run longer and work harder. Running a damp finger along the lip reveals cracks you might miss visually, as does examining the smooth surface for trapped debris. If you notice a persistent burning odour or condensation forming around the door, the seal is likely compromised. Replacing it early is far less costly than letting escaping heat strain the heating element and sensors.
Drum bearings provide the supporting axis for every rotation. A failing bearing often announces itself through a low rumbling that deepens as the cycle progresses. You can check for slack by grasping the drum’s front edge and attempting to move it side to side and up and down. Any discernible movement beyond a few millimetres suggests bearing wear. Worn bearings also leave fine metallic dust on the door glass, a tell-tale sign that the assembly needs professional attention. Catching this early prevents the drum from seizing entirely.
A simple inspection routine every few months catches these issues before they escalate. Look for:
- Tears, folding, or stiffening in the door seal material
- Residue build-up around the gasket’s inner edge
- Visible play in the drum when you rock it gently
- Discolouration on the glass surrounding the bearing housing
Addressing these mechanical tell-tales promptly means miele tumble dryer repairs remain straightforward and affordable. Ignoring them invites damage to the main control board and motor mounts, turning a simple fix into a costly overhaul.
Scheduling Annual Professional Tune-Ups
Regular maintenance is the reason some machines last a decade or more, not just the quality of the build. A healthy tumble dryer rewards you with low energy bills and consistent performance. This begins with simple habits, but extends far beyond them. There is a line between prudent upkeep and proactive servicing, and most owners only discover it after the damage is done. Manufacturers recommend a professional check-up every 12 to 18 months for machines in daily use. This is not a marketing ploy; it is engineering guidance.
During a tune-up, a technician inspects components your monthly cleaning routine cannot reach. They assess belt tension, motor brushes, and the electronic control board for signs of stress. They also measure airflow resistance, which is a silent killer of heating elements. Ignoring these checkpoints means you are relying on luck. The annual visit is a low cost against the replacement of a main control board.
- The technician verifies thermal cutoff integrity under load
- They service the drum rollers and axles if required
- They clean heat exchanger fins which harbour hidden microfibre deposits
- They calibrate the moisture sensors for accurate cycle termination
Addressing these points prevents the niggling faults that build over time. A machine that dries your sheets in 40 minutes today might take 55 minutes next year without you noticing the gradual change. This inefficiency inflates your electricity bill. An inexpensive tune-up restores the original performance curve, keeping miele tumble dryer repairs firmly in the realm of rare occurrences rather than a season fixture.

0 Comments