Common Dryer Problems and When to Call a Professional
Unusual Noises During Operation
A grinding screech from the drum rarely resolves itself. That metallic rasp often points to worn drum bearings or a seized idler pulley, components that endure constant friction. A thumping rhythm suggests a loose drum support roller or an object trapped beneath the drum.
Common culprits include:
- Worn drum bearings producing a low rumble or grind.
- A loose or damaged idler pulley that squeals under load.
- Foreign objects rattling in the base.
Some sounds are benign, like the soft click of the thermal cut-out. But persistent banging or squealing needs attention. Running the machine while it grinds accelerates damage to the belt and motor. Ignoring these warnings turns a quick repair into an expensive replacement.
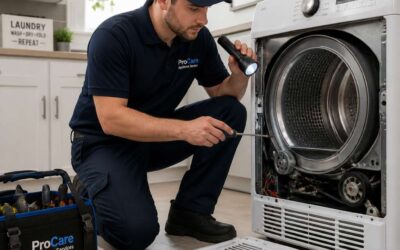
When the noise becomes intrusive and you lack confidence in disassembling the cabinet, contact a tumble dryer mechanic. They have the tools to diagnose faults safely and source genuine parts. A technician will inspect the belt, rollers, and motor mount before quoting for work.
Clothes Not Drying Completely
The average dryer cycle costs around 50p in electricity, so a failed dry is money wasted. When clothes come out damp after a full cycle, the problem usually lies in airflow or heat delivery. A blocked lint filter or a crushed vent hose restricts circulation, leaving moisture trapped inside the drum.
Sometimes the issue is electrical. A faulty heating element or a failed thermostat will run the machine without generating enough warmth. These components are inexpensive but require multimeter testing to confirm. If you are not comfortable opening the rear panel, a tumble dryer mechanic can diagnose the fault in minutes.
- Blocked condenser or lint screen
- Faulty heating element
- Broken thermostat
- Overloaded drum
Overloading is a common mistake. Packing the drum too tightly prevents air from moving between garments. The result is a long cycle with damp patches. A professional will also check the vent path and heat exchanger, ensuring the entire system works as intended.
Overheating or Burning Smell
A burning smell from your tumble dryer is never normal. That acrid odour signals friction, overheating, or electrical stress inside the machine. Lint settling on the heating element or around the motor chars and releases an unmistakable scent. Restricted airflow through a crushed vent hose can also push internal temperatures beyond safe limits.
Sometimes the cause is mechanical. A worn drum bearing or a slipping drive belt generates heat through friction, which transfers to the drum and your laundry. Electrical faults, such as loose wiring or a failing thermal fuse, produce a distinct metallic burning smell.
- Persistent burning smell after cleaning the lint filter
- Hot spots on the dryer body during operation
- Cycle stops with an overheating error code
These signs point to internal failures requiring component-level testing. A tumble dryer mechanic can inspect the thermistor, heating element, and wiring loom safely. When the smell lingers, a tumble dryer mechanic should examine the machine before another load.
Error Codes and Electrical Issues
Modern tumble dryers communicate through error codes, and each code is a specific plea for help. A machine that refuses to start and flashes a door lock or thermistor warning is rarely experiencing a random glitch. Behind those symbols often sits a failed electrical component. In many UK homes, the same error code appears repeatedly because the underlying wiring fault persists.
If you notice these electrical signs, the problem is more than a sensor quirk:
- Repeated tripping of the reset button
- Flashing warnings immediately after a power outage
- A machine that powers down mid-cycle
These patterns point to damaged wiring or a compromised control board. A tumble dryer mechanic can test voltage and continuity to isolate the fault. That diagnostic work requires specialised tools. Ignoring the code tempts the dryer into deeper damage. I have seen machines where a simple error code masked a serious electrical hazard. A professional resolves the root cause, not just the visible symptom.
How to Choose a Qualified Dryer Repair Technician
Verify Licenses and Certifications
One misdiagnosis can turn a simple repair into a costly replacement. The difference often comes down to the credentials of the person holding the screwdriver. When you search for a tumble dryer mechanic, never assume that a van full of tools equals expertise.
Start by verifying their licenses and certifications. In the United Kingdom, legitimate technicians should hold relevant electrical safety qualifications, such as Part P or a recognised apprenticeship. Many manufacturers also offer specific training programs for their brands. Ask to see proof of insurance and any trade body memberships.
- Check for Gas Safe registration if your dryer uses gas.
- Confirm public liability insurance covers the work.
- Request written evidence of manufacturer certifications.
A qualified tumble dryer mechanic will happily provide these details. Vague answers or excuses are red flags.
Check Experience with Your Dryer Brand
A dryer is not a universal machine. Each brand has its own engineering quirks, from Bosch’s heat pump algorithms to Miele’s belt tension systems. A tumble dryer mechanic with deep experience in your specific manufacturer will spot a failing thermistor in minutes, where someone else might guess for hours. That familiarity translates into fewer wasted visits and a repair that holds.
When you contact a potential technician, ask pointed questions about brands machinaries they service daily. For instance, inquire how many units of your model they have dismantled recently. A credible specialist recalls specific faults, such as condenser blockages on certain Hotpoint models, without reference notes.
Here is what separates a brand-educated professional from a generalist:
The right fit is someone who speaks your dryer’s language fluently, not just someone with a van full of parts. That targeted experience is your shortcut to getting clothes dry again.
Read Customer Reviews and Testimonials
Most glowing reviews say little beyond “great service” or “nice guy.” Those do not help you choose. When vetting a tumble dryer mechanic, read the detailed testimonials. Look for patterns in the wording. Successful repairs that held up over time, transparent pricing, and clean workmanship are the markers of a specialist. A review that mentions a specific part replaced, such as a bearing or a heating element, carries more weight than a generic five star rating.
You should also examine how the business responds to criticism. A qualified professional will address negative feedback directly and offer solutions. This speaks to their accountability.
When scanning through customer testimonials, pay attention to these points:
– Check for mentions of visit duration and tidiness.
– Look for comments about the clarity of the diagnosis.
– Note if the review discusses the longevity of the repair.
One in three online reviews are fake, so do not rely on overall scores alone. Real experiences, with concrete details, will guide you to a reliable tumble dryer mechanic for your appliance.
Request Written Estimates Before Work Begins
A written estimate separates a professional tumble dryer mechanic from a casual handyman. Never accept a verbal quote, because the final bill can drift upward once the machine is opened. A reputable specialist will inspect the appliance, identify the faulty component, and put the projected cost on paper before any work begins.
The estimate should include:
- The specific parts required, with brand and model numbers.
- A breakdown of labour and callout charges.
- The expected duration of the repair.
- Confirmation of any warranty on parts and workmanship.
If a tumble dryer mechanic hesitates to provide this breakdown, treat it as a warning sign. Transparent pricing protects you if the repair runs longer than anticipated, and it gives you a benchmark to compare against other quotes. Written estimates also prevent disputes later, because both parties have agreed on the scope before a single screw is turned.
Inquire About Warranty on Parts and Labor
The written estimate protects you before the repair starts; the warranty protects you after it ends. I always advise clients to treat the warranty as part of the repair itself, not an afterthought. A reputable tumble dryer mechanic will stand behind their work with a clear guarantee on both parts and labour. Before you commit, check the terms:
- How long the parts warranty runs
- Whether labour covers a repeat callout for the same fault
- Any conditions that could void the coverage
Many UK repair firms offer 90 day coverage, while others extend to six months or a year. That difference reflects component quality and diagnostic thoroughness. A written warranty naming the exact duration and conditions protects you if the dryer fails again. If a mechanic hesitates to answer these questions, that is reason to look elsewhere.
The Cost of Hiring a Professional Dryer Repair Service
Typical Service Call Fees
A single service call in the UK can set you back £60 before the mechanic even opens the hatch. That figure is just the start. Most tumble dryer mechanic visits include a fixed diagnostic fee, which covers the initial inspection and the labour to access the drum, heating element, or condenser unit.
Typical service call fees break down into three parts:
- A call-out charge, usually between £40 and £80 depending on your postcode.
- Labour, billed at £50 to £90 per hour, with most repairs taking under an hour.
- Parts, quoted separately after the fault is identified.
Some firms waive the call-out fee if you proceed with the repair. Others apply the diagnostic fee toward the final bill. Always ask how the tumble dryer mechanic structures their pricing before agreeing to the visit.
Parts Pricing vs. Labor Charges
A heating element for a popular condenser dryer costs £25 at trade prices. The invoice for fitting it often lands near £180. That gap shows where real money goes. A tumble dryer mechanic rarely earns from the parts alone; the bulk of the bill is labour, and that labour covers far more than turning a screwdriver.
Access time drives the cost. Many tumble dryers require near-total teardown to reach a blocked condenser, a worn bearing, or a faulty thermostat. The mechanic works through stacked drums, side panels, and wiring looms before the defective component becomes visible. Labour rates of £50 to £90 per hour become telling when a simple thermal fuse sits behind forty minutes of disassembly.
- Diagnostic time: testing components with a multimeter takes time, and an experienced eye is not free.
- Reassembly care: a loose connection causes callbacks, so verification matters.
- Part sourcing: trade accounts secure lower prices, but the client pays a mark-up for stockholding and warranty handling.
Parts rarely cause the final shock. The cost of hiring a professional dryer repair service lives in the hours spent accessing, testing, and reassembling, not in the component itself.
Factors That Affect the Final Bill
The final bill from a tumble dryer mechanic often surprises people, but the numbers follow a logic beyond parts and basic labour. Your postcode matters. In central London, travel time and overheads push rates higher than in a rural town. The machine’s age also plays a role. Older dryers with corroded fixings can double the time needed for safe disassembly, and that effort shows up on the invoice.
– The type of fuel connection, if your dryer uses gas, requires a certified engineer with additional qualifications.
– The availability of the exact component, where an uncommon motor might need sourcing from abroad.
– The time of year, as emergency callouts during winter weekends attract premium rates.
Even the dryer’s placement affects cost. A unit squeezed into a tight undercounter space demands more careful extraction, and that extra care is billable. I have seen a tumble dryer mechanic quote £40 just to move the appliance safely before any real work begins. Smart homeowners ask about these variables upfront, because the final figure rarely depends on the broken part alone.
DIY Maintenance Tips to Reduce Repair Calls
Clean the Lint Filter After Every Load
Every year, thousands of UK households call out a tumble dryer mechanic for faults that began with a blocked lint filter. The mesh screen is your first line of defence, yet it is also the most overlooked component in the machine. When it fills with fluff, the airflow drops and the heating element works harder than it should.
That extra strain does not stay silent for long. Cycles take longer, the drum runs hotter, and the moisture sensors begin to misread humidity levels. A tumble dryer mechanic sees this pattern constantly. The remedy is straightforward, but the damage is often already done by the time a professional arrives.
Consider what the filter actually catches:
- Cotton and synthetic fibres
- Pet hair and dust mites
- Coins, buttons and stray pocket debris
All of that material should leave the machine after each use, not remain pressed against the mesh. Thirty seconds of attention keeps the airflow steady and reduces premature wear on the thermostats and heater assembly.
Inspect and Clean the Venting System Regularly
Homeowners frequently assume the venting system ends at the back of the machine. In reality, it continues through the wall and often holds the very fault that brings a tumble dryer mechanic to the door. The filter catches obvious debris, but fine lint particles still travel through the exhaust path. Over months, those particles accumulate inside the ductwork, reducing airflow and forcing the machine to work harder.
A typical UK household venting setup includes:
- Flexible foil ducting
- Rigid metal piping
- External wall vent flaps
Each component needs periodic inspection. Blocked external flaps are especially common, with bird nesting or wind-blown debris restricting the outlet. A tumble dryer mechanic often finds the machine itself faultless, with the real problem sitting further down the vent run. Compressed lint in ducting also increases fire risk, which is why UK building regulations cap vent lengths at specific figures.
Keep the Area Around the Dryer Clear of Debris
Most tumble dryer faults begin with the space around the machine, not the drum or motor. A tumble dryer mechanic once told me he had solved dozens of performance complaints simply by asking owners to shift boxes away from the rear air intakes.
Keep a clear radius around your dryer, especially behind it, so it can draw fresh air easily. Use a vacuum crevice tool on the floor beneath anda behind the unit every few weeks. Trust me, lint bunnies are more than a cosmetic annoyance; they get pulled into the cooling fan and motor assembly, which shortens its lifespan.
- Laundry baskets and hampers
- Drying racks or folded clothes piles
- Plastic bags and packaging materials
This clear zone also lowers fire risk, since dry lint near a heat source is a hazard. When the area stays tidy, you givea tumble dryer mechanic unobstructed access for inspections, which makes any future repair visit quicker and less disruptive.
Check the Drum Seal and Belt Tension
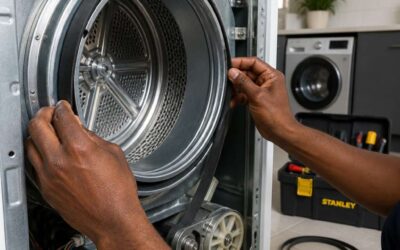
I rarely see a dryer that fails without warning. The drum seal, that soft rubber lip at the front,and the belt underneath usually show distress first. Cracks in the seal allow moist air to bypass the lint filter, adding minutes onto every cycle. A belt with less spring slips under load, producing a thumping spin. Both components are cheap and easy to inspect, yet most owners ignore them until a service call.
A tumble dryer mechanic will often ask about these before opening the machine. Loose lint or a damp patch near the drum edge means it is time to look closer:
- Bulges or tears in the rubber lip
- A belt that feels flat or polished on its ribbed side
- Resistance when you turn the drum by hand
Catching those signs early keeps your dryer efficient and reduces emergency repair visits.
Avoid Overloading the Machine
Most premature drum bearing failures come from overloaded wash piles, not age alone. Packing the dryer to capacity strains the belt, compresses the drum seal unevenly,and runs the motor hotter than intended. I see this pattern weekly as a tumble dryer mechanic: householders saving time by cramming one large cycle into the day.But a loosely tumbling load dries faster, consumes less electricity,and keeps drum bearings within normal limits!
Before you slam the door shut, a tumble dryer mechanic advises watching for these overload signs:
- clothes emerge as a single dense ball after the cycle ends
- the drum barely turns when pushed by hand midway through a load
- cabinet rocks visibly during spin
If any appear, split the wash into two smaller batches. The extra minutes spent running an additional dry cycle cost less than the repair bill for a warped drum shaft, which follows sustained overload.
Schedule Annual Professional Inspections
Some maintenance tasks need a professional eye. A tumble dryer mechanic can spot worn drum rollers or failing thermostats before they cause a breakdown. But between those visits, small habits extend the machine’s life.
Level the dryer monthly. An uneven base makes the drum wobble, which strains the bearings over time. Clean the moisture sensor strips with a soft cloth every few weeks. A film of fabric softener residue tricks the sensor into thinking clothes are dry, so cycles run longer than needed.
- Check the door latch for smooth closure.
- Vacuum the rear panel grille to keep airflow steady.
- Listen for changes in the drum rotation sound.
Schedule annual professional inspections to catch issues early. The modest fee for a tumble dryer mechanic far outweighs the cost of replacing a seized drum bearing or a burnt-out heating coil.

0 Comments